Boat construction is considered by many to be the ultimate test of carpentry skills. Also a test of patience as many hours of work sometimes spanning years are required to construct a seaworthy craft.

Boat construction is considered by many to be the ultimate test of carpentry skills. Also a test of patience as many hours of work sometimes spanning years are required to construct a seaworthy craft.


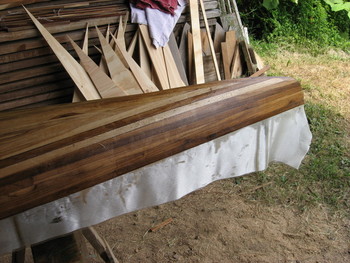
Now that the hull and deck are all stripped, it's time to do the final sanding, fill the gaps, sand again, and get ready to apply the fiberglass. Here's a shot of the hull after final sanding and waiting for a base coat of epoxy resin.
Moving on, the next step is to mix some epoxy resin and put the sealer coat on. I used a squegee to apply the resin although a brush or roller would have worked. I'm not too keen on the roller idea since a fair amount of the expensive resin is wasted in the roller but a brush might have worked a little better. Had a problem with the epoxy going off before using it all up. Figured out that smaller batches works much better to avoid that. But, that's what this boat is all about, learning. And I'm learning a lot about fiberglass!
Okay, that was the easy part. Time to see what this fiberglass stuff is all about. But there's a problem. I thought that what I ordered from my supplier in Tilaran was 1 meter wide by 25 meters of fabric. Turns out what I got was only 67cm wide which didn't cover the bottom of the hull. This was a setback and took a couple days of pondering different approaches until Ron suggested splitting the middle so it would reach the sides. Seemed reasonable. Planned on adding an extra layer of cloth on the center of the bottom for added strength. This would mean adding one other layer to end up with a double layer where I'd planned to have it anyways so that's how that problem was solved. These photos show the cloth cut and layed out on the hull prior to mixing epoxy. Of course there was a breeze so the towels are on there to hold the cloth down.
Again, I used the squegee to apply the epoxy to wet out the cloth. Based on my earlier experience of mixing too large a batch I began with a small amount of epoxy. Turns out a larger batch is okay because the cloth absorbs quit a bit of the resin so is used up much faster. The process has proceeded up to this point pretty much the way it's been described in various sources. Each of the howtos I read seemed to have a little different way to apply the resin but the bottom line was don't leave too much on. The idea is to fill the cloth and nothing more. The only challenges I had were the cut edges fraying out when I ran the squegee over them and dealing with the bow and stern. I cut some of the frayed threads off as I went along but it was impossible to manage all of them. I'll be sanding those out later I guess. Folding the cloth over the bow and stern wasn't all that challenging really, just an extra step of making the cut and then making the flaps lay over onto each other smoothly. Here's a few shots of wetting out the cloth.
That didn't go too bad. I did find out the next day that there were a few places where the cloth separated from the wood. Was able to get them to stick by rolling a metal tube over those spots. Also added a little extra epoxy I had left from coating the cockpit coaming. So, here's some shots of the second layer of epoxy with the cloth embedded. I'm still amazed that the cloth goes completely clear.


